Design your table layout
Draw your dining room, bar and patio so the POS floor screen matches the real room.
The table layout is the map servers tap on the POS to open a table. You build it in the back office (login.realpos.net) under Table Layout. You can have more than one layout, for example "Dining Room", "Bar" and "Patio". Each one shows as its own tab on the POS floor screen.
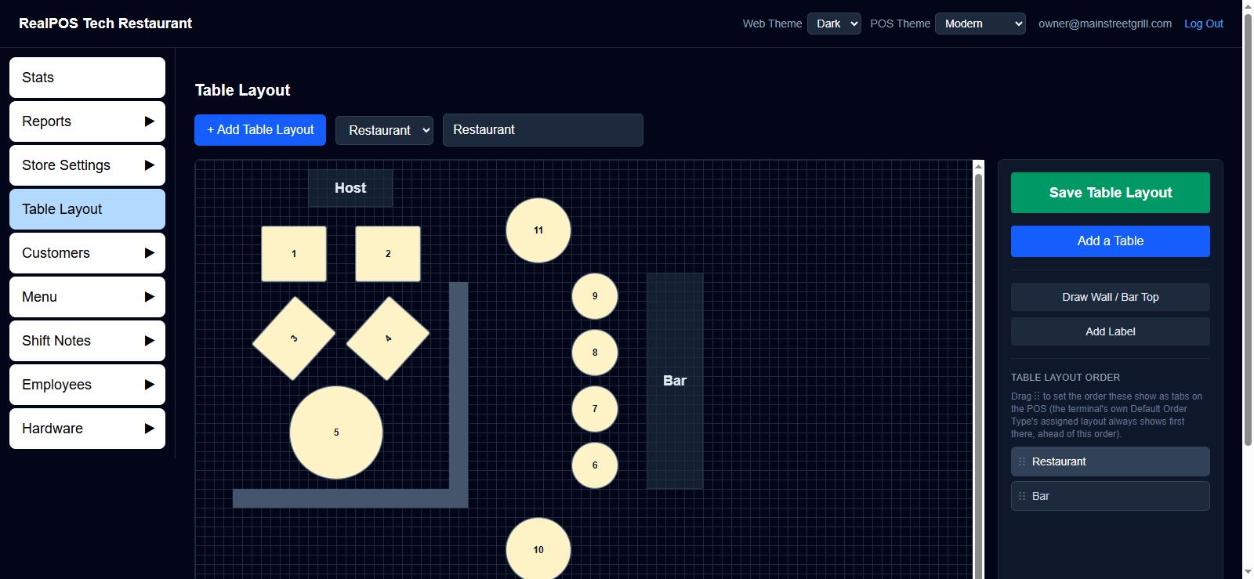 The Table Layout designer
Add a layout
- In the back office, open Table Layout.
- Click + Add Table Layout.
- Type a name in Name this table layout and click OK.
The new, empty layout opens. To switch between layouts, use the drop-down next to + Add Table Layout. To rename the layout you're on, type in the name box beside the drop-down and click away (or press Enter). Two layouts can't share a name.
Add and set up tables
- Click Add a Table. A square, 4-seat table appears, numbered after your highest table.
- Drag it where you want it.
- With the table selected, use the panel on the right:
- Table Name: the number or name servers see. It must be unique on the layout.
- Seats: tap − or + (1 to 50).
- Shape: square or round.
- Drag the blue dots to resize. On a square table, the green dots just outside the corners rotate it.
- Click Save Table Layout. Nothing changes on the POS until you save.
Walls, bar tops and labels
- Draw Wall / Bar Top: click it, then click and drag on the canvas to draw. Walls can be resized and rotated like a square table.
- Add Label: click it, then click the canvas where the text should go and type, for example "Patio" or "Kitchen". Click a label later to change its text. A label can't sit on top of a table.
Work with several items at once
Shift-click to select several items. Drag any of them to move the group together. When you've selected only tables, the panel shows Seats and Shape controls that set every selected table at once. Right-click the selection to Duplicate or Delete all of it.
Choose the order of the POS tabs
When you have more than one layout, a Table Layout Order list appears in the right panel. Drag the ⋮⋮ handle to set the order the tabs appear on the POS.
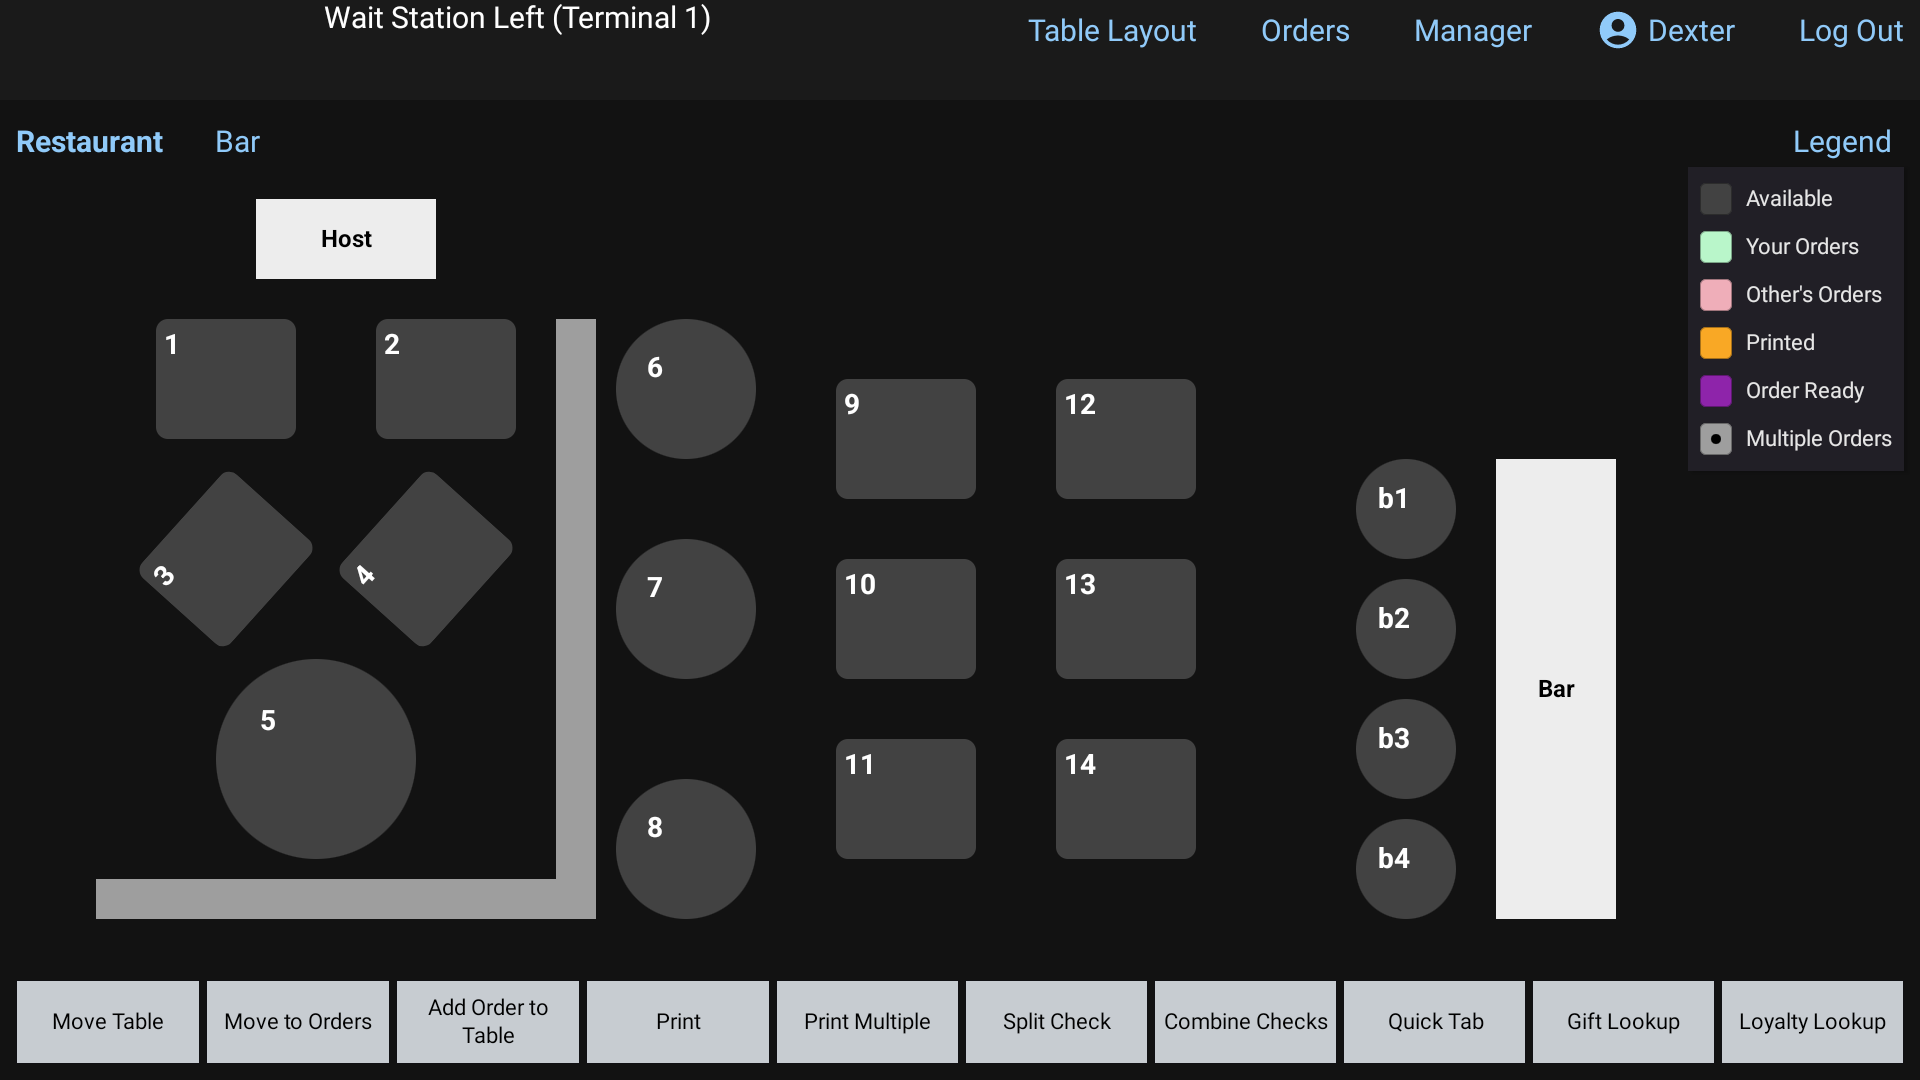 Layout tabs on the POS floor screen
Good to know
- Click Save Table Layout before you leave the page. Moves, new tables and deletes are only kept once you save.
- Deleting a table on the layout removes it from the POS floor after you save.
- An order type can be tied to a layout under Menu > Order Types (the Table Layout setting), so starting that order type takes the server to the right room. See Order types.