Printers and kitchen screens
Add kitchen and bar printers and kitchen display screens, choose which items go where, and design your printed tickets.
Kitchen printers, bar printers and kitchen display screens (KDS) are all set up in one list. Each item on your menu is sent to the devices you choose. You manage them in the back office (login.realpos.net) under Hardware > Printers/KDS, or on the POS under Manager > Hardware > Printers/KDS.
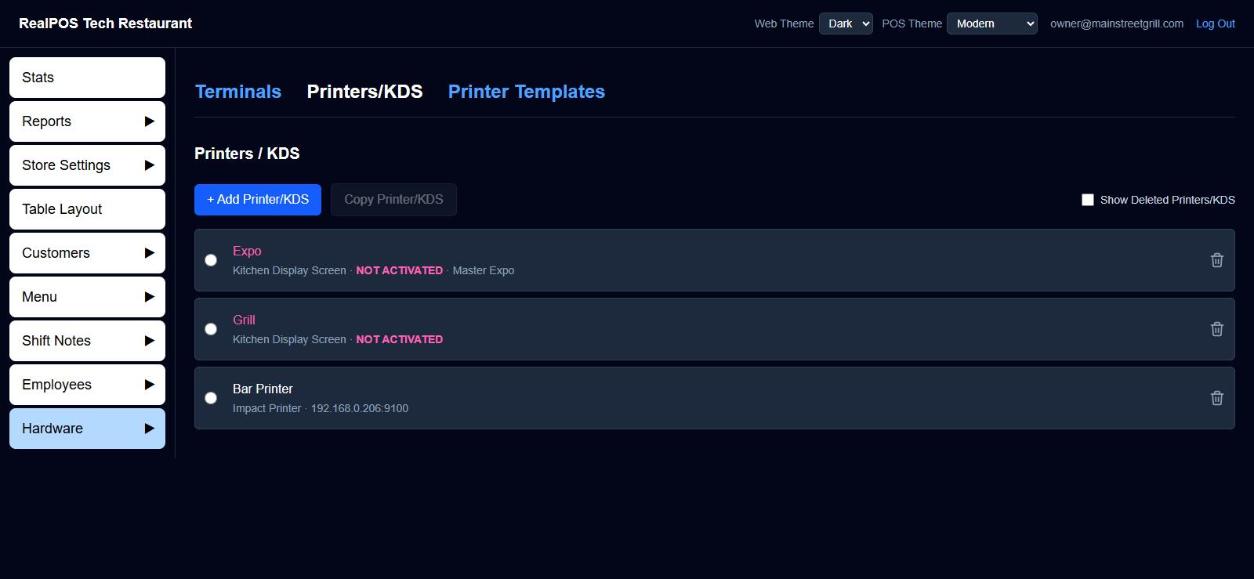 The Printers / KDS list
Add a printer or screen
- Click + Add Printer/KDS. The new device opens.
- Pick the Device Type:
- Impact Printer: a dot-matrix kitchen printer such as the Epson TM-U220B. Plain text only.
- Thermal Printer
- Kitchen Display Screen
- Give it a Printer/KDS Name, for example Expo, Grill or Bar Printer.
- Enter its IP Address on your local network. Type just the address; the port is added for you.
- Fill in the rest (below) and click Save.
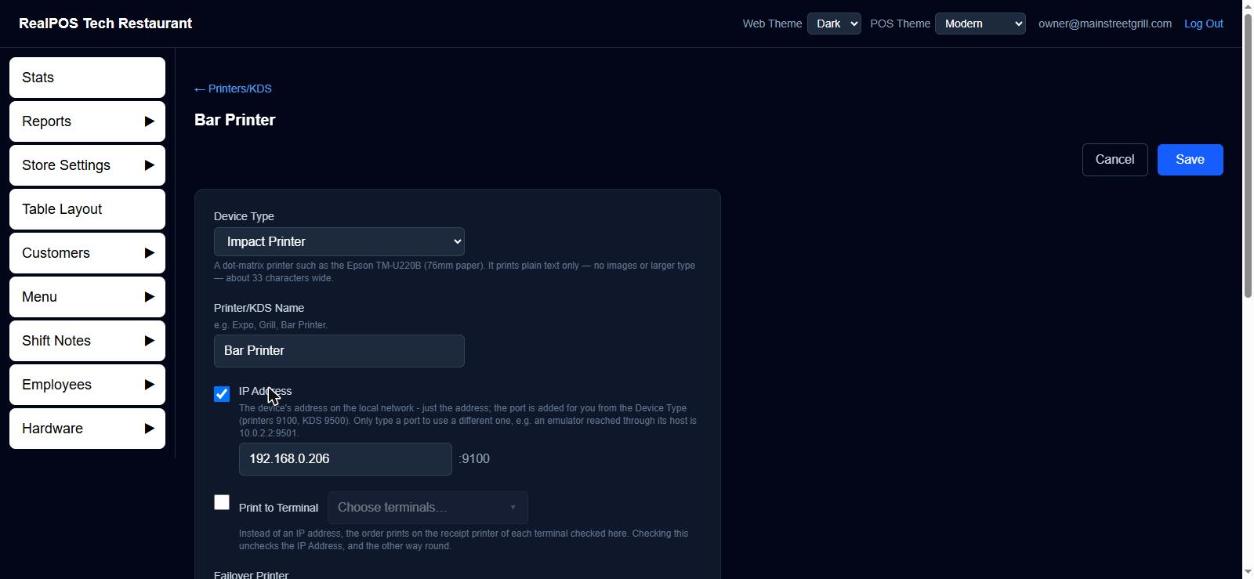 Editing a printer or screen
Copy Printer/KDS copies the selected device, including its item list, onto a new one. The copy's IP address is left blank because every device needs its own.
Where a printer prints
A printer prints to its IP address (ticked by default) or, instead, to terminals' receipt printers:
- Print to Terminal: tick it and choose terminals. The ticket prints on the receipt printer of each terminal you check. Ticking this unticks the IP address, and the other way round.
If a device is down
Failover Printer is where the order goes if this printer or screen is down. You can pick another kitchen or bar printer, a terminal's receipt printer, or another kitchen display. Left on the default, the order prints on the receipt printer of the terminal it was entered on.
Choose which items go to a device
Under Items Assigned to this Device, click + Add, tick the items and click OK. Click Remove to take one off.
This works both ways: adding an item here also adds this device to that item's own Printer / KDS setting in Menu > Items. See Menu items.
Kitchen display options
For a Kitchen Display Screen you also get:
- Master Expo: this screen receives every item sent to any other screen. Other screens bump item by item; this one bumps the whole order. A Master Expo screen doesn't use an item list.
- Ignore Master Expo: this screen doesn't report to the Master Expo. It works on its own, with a bump button on each ticket.
You can tick one or the other, not both.
Connect a kitchen screen
The kitchen screen app needs no login. When it first opens it shows Kitchen Display - ready to connect and the tablet's own address.
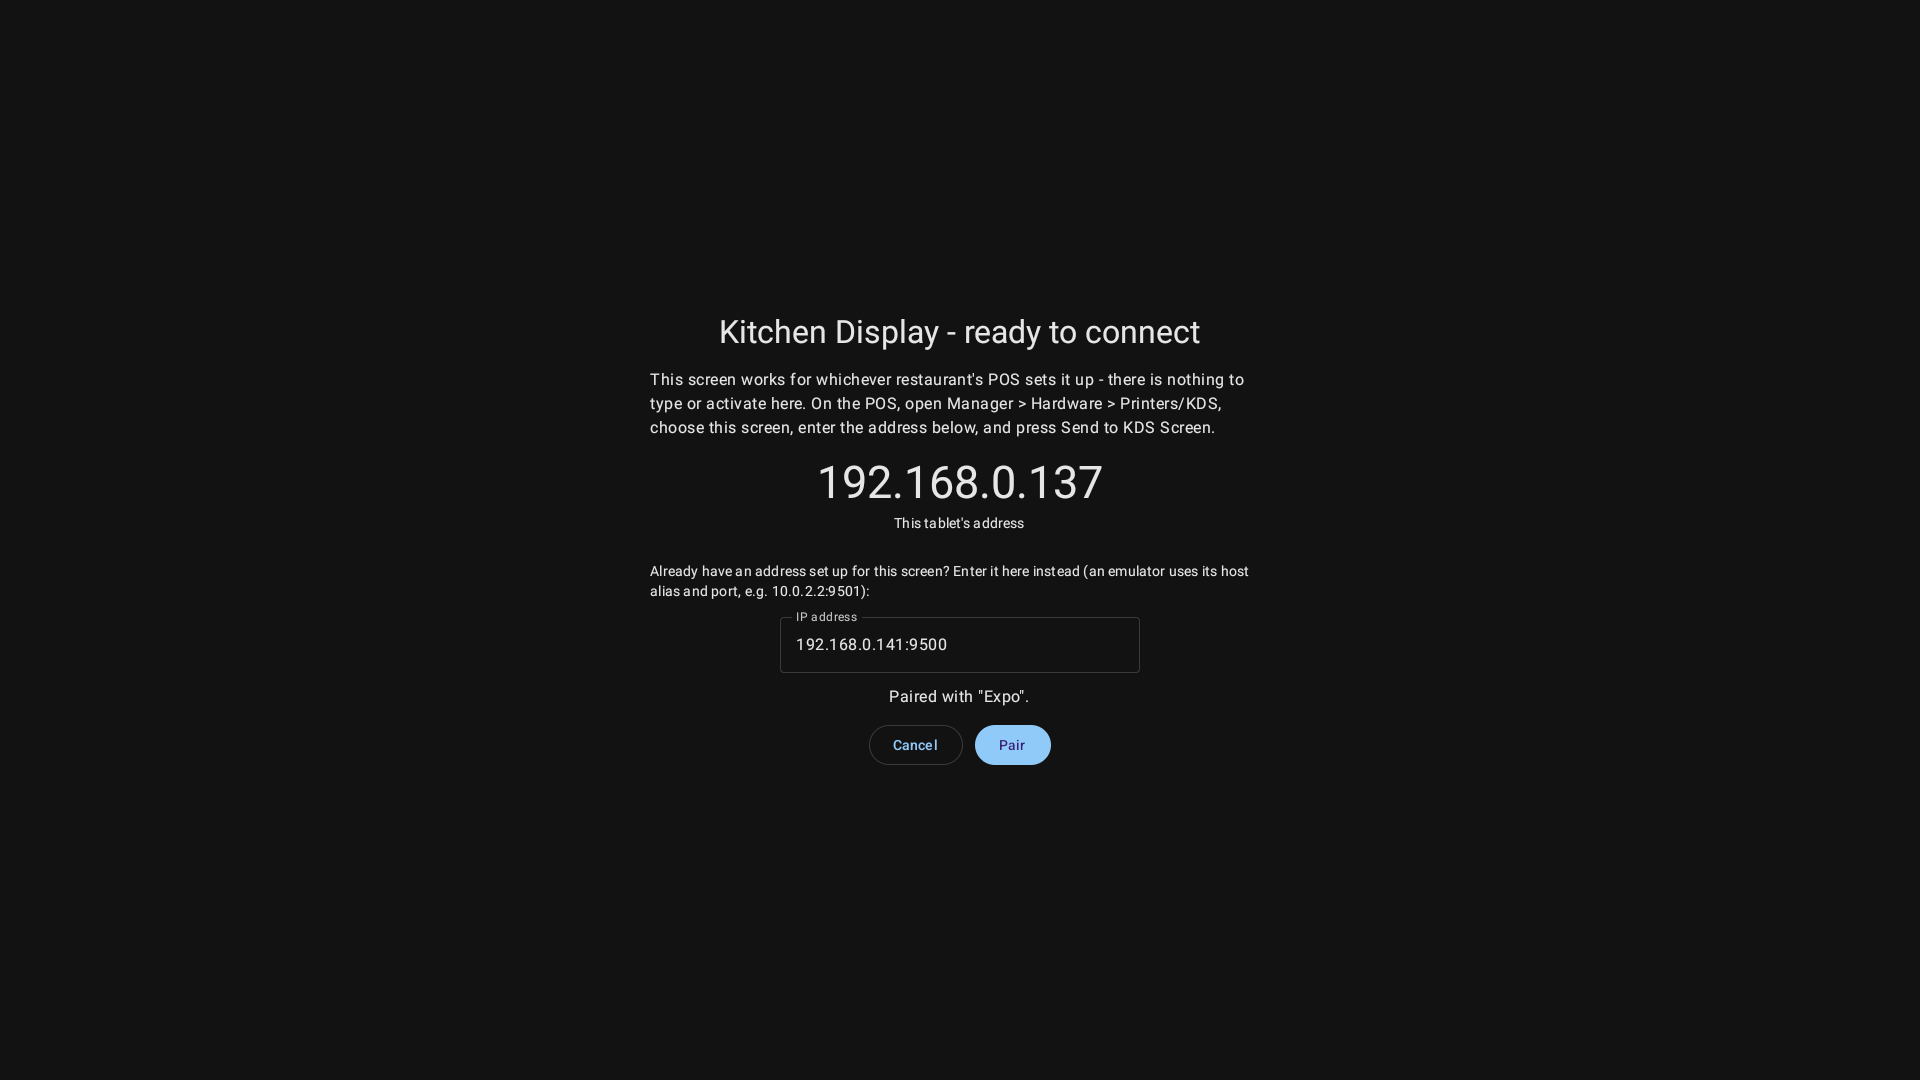 The kitchen screen waiting to connect
- In the back office, add the device as a Kitchen Display Screen with that address and save it.
- On a POS terminal in the restaurant, open Manager > Hardware > Printers/KDS and open that screen.
- Check the address and press Send to KDS Screen.
The screen then shows its kitchen view. Until a screen is connected, the Printers/KDS list shows it in pink as NOT ACTIVATED.
Printer templates
Printer templates control what prints on checks, receipts and kitchen tickets. Open Hardware > Printer Templates. There are three system defaults that can't be deleted:
- Check Template: the check handed to the table. Shows cash and card prices.
- Receipt Template: the receipt after payment. Shows only the price of the payment type used.
- Kitchen/Bar Template: the ticket printed in the kitchen or at the bar. No prices.
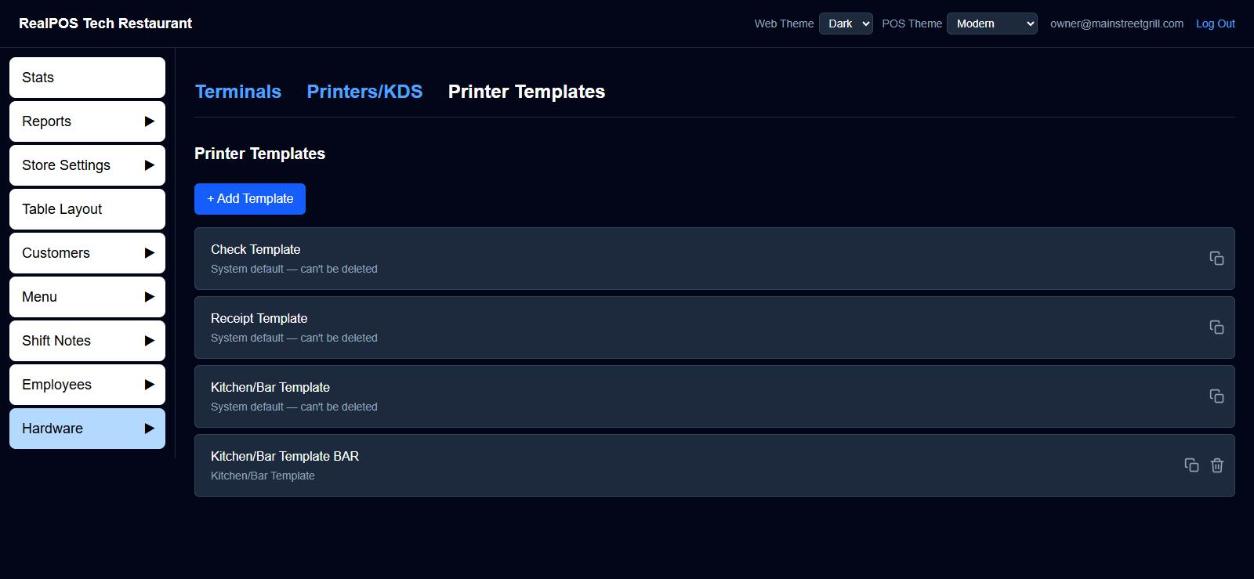 Printer Templates
To make your own, click + Add Template and pick the kind, or use the copy icon on an existing one. Give it a Template Name (the type is put in front of it, for example "Check Template Patio"). A Preview beside the settings shows how it will print.
Check and receipt templates have:
- Large Font, Print Modifier Prices, Combine Like Items as Qty and Print Barcode
- Header: tick Enable and Bold Font for lines such as Server, Guest Count, Table, Guest and Order Type. Order # always prints. Receipts also have Show Items.
- Recommended Gratuity: suggested tip percentages printed below the totals, calculated before or after discounts.
- Custom Footer: your own lines at the bottom, each with Bold Font.
Kitchen/Bar templates have Combine Like Items as Qty, Print Items by Seats, Print Separator Line, font sizes for the header, items and footer, and footers for order type, guest name and date/time.
Then choose which template to use:
- A terminal's checks and receipts: Hardware > Terminals, the terminal's Hardware tab. See Terminals.
- A kitchen or bar printer: the Printer Template setting on the printer.
Deleting a template sends any terminal using it back to the system default.
Good to know
- The trash can on the list removes a device. Tick Show Deleted Printers/KDS to see removed ones and bring one back.
- A kitchen display screen doesn't use a printer template.