Getting Started
For owners setting up a new RealPOS restaurant: sending in your menu, employees, jobs and security, discounts and tax.
Online version with search and the Ask assistant: help.realpos.net/getting-started
- Welcome to RealPOS
- Sign in to the back office
- Submit your menu for programming
- Add jobs and set their security
- Enter your employees
- Set your tax rate
- Set up discounts
- Before you open
Welcome to RealPOS
What the pieces of RealPOS are, what your dealer has already set up, and the order to set up the rest.
Welcome! This guide walks you through getting your restaurant ready to open on RealPOS. Read this page first, then work through the pages in order.
#The pieces
RealPOS is a few pieces that work together. Everything you set up in one place reaches the others on their own.
POS terminals. The touch-screen stations at the bar, the host stand or the counter. Staff sign in with their own 4-digit PIN, clock in, open tables and orders, send items to the kitchen and take payment. Each terminal is activated once with an activation code from your dealer.
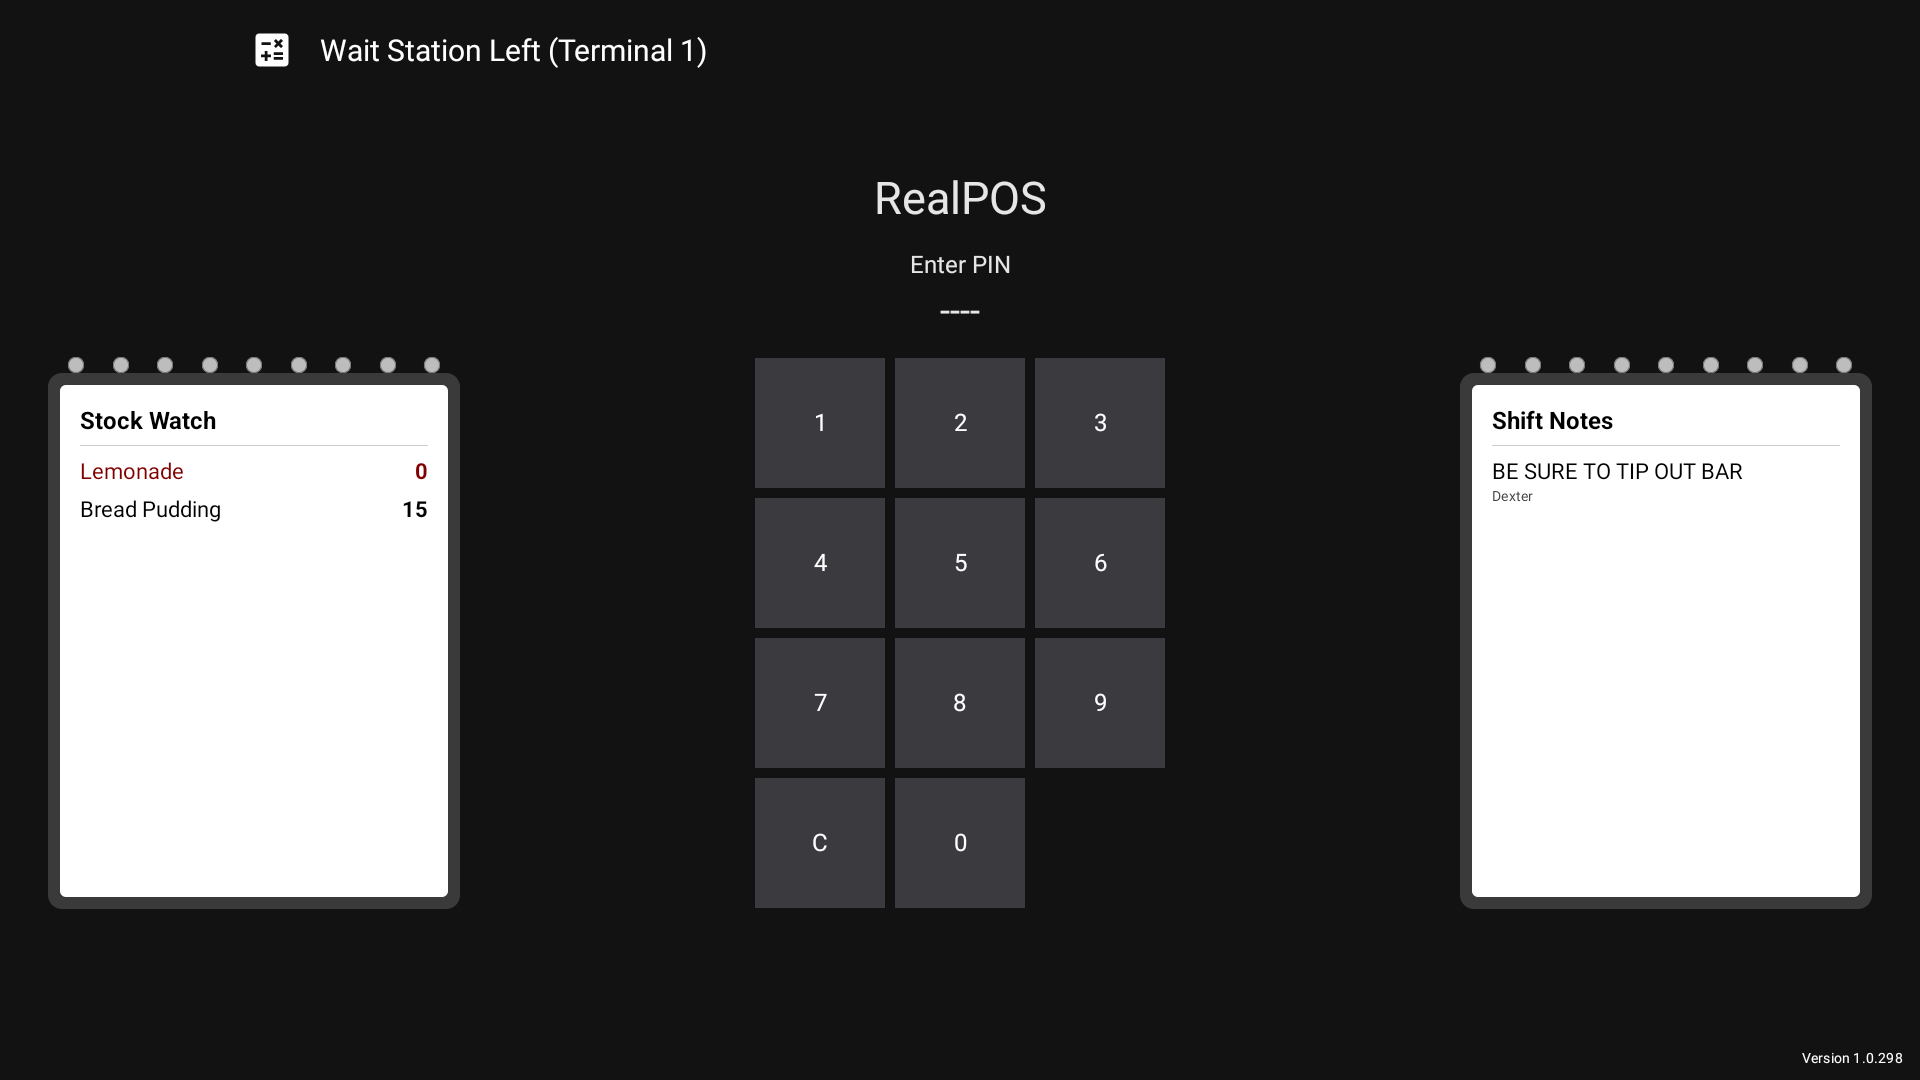 The POS sign-in screen, where staff type their PIN
Handhelds. Small handheld devices your servers can carry to the table. They sign in with the same PIN and can open tables, take orders and take payment. Like terminals, each handheld is activated with a code from your dealer.
Kitchen screens. Screens in the kitchen (and at Expo) that show orders as they are sent, instead of or as well as kitchen printers. There is nothing to type on the kitchen screen itself: it is connected from a POS terminal.
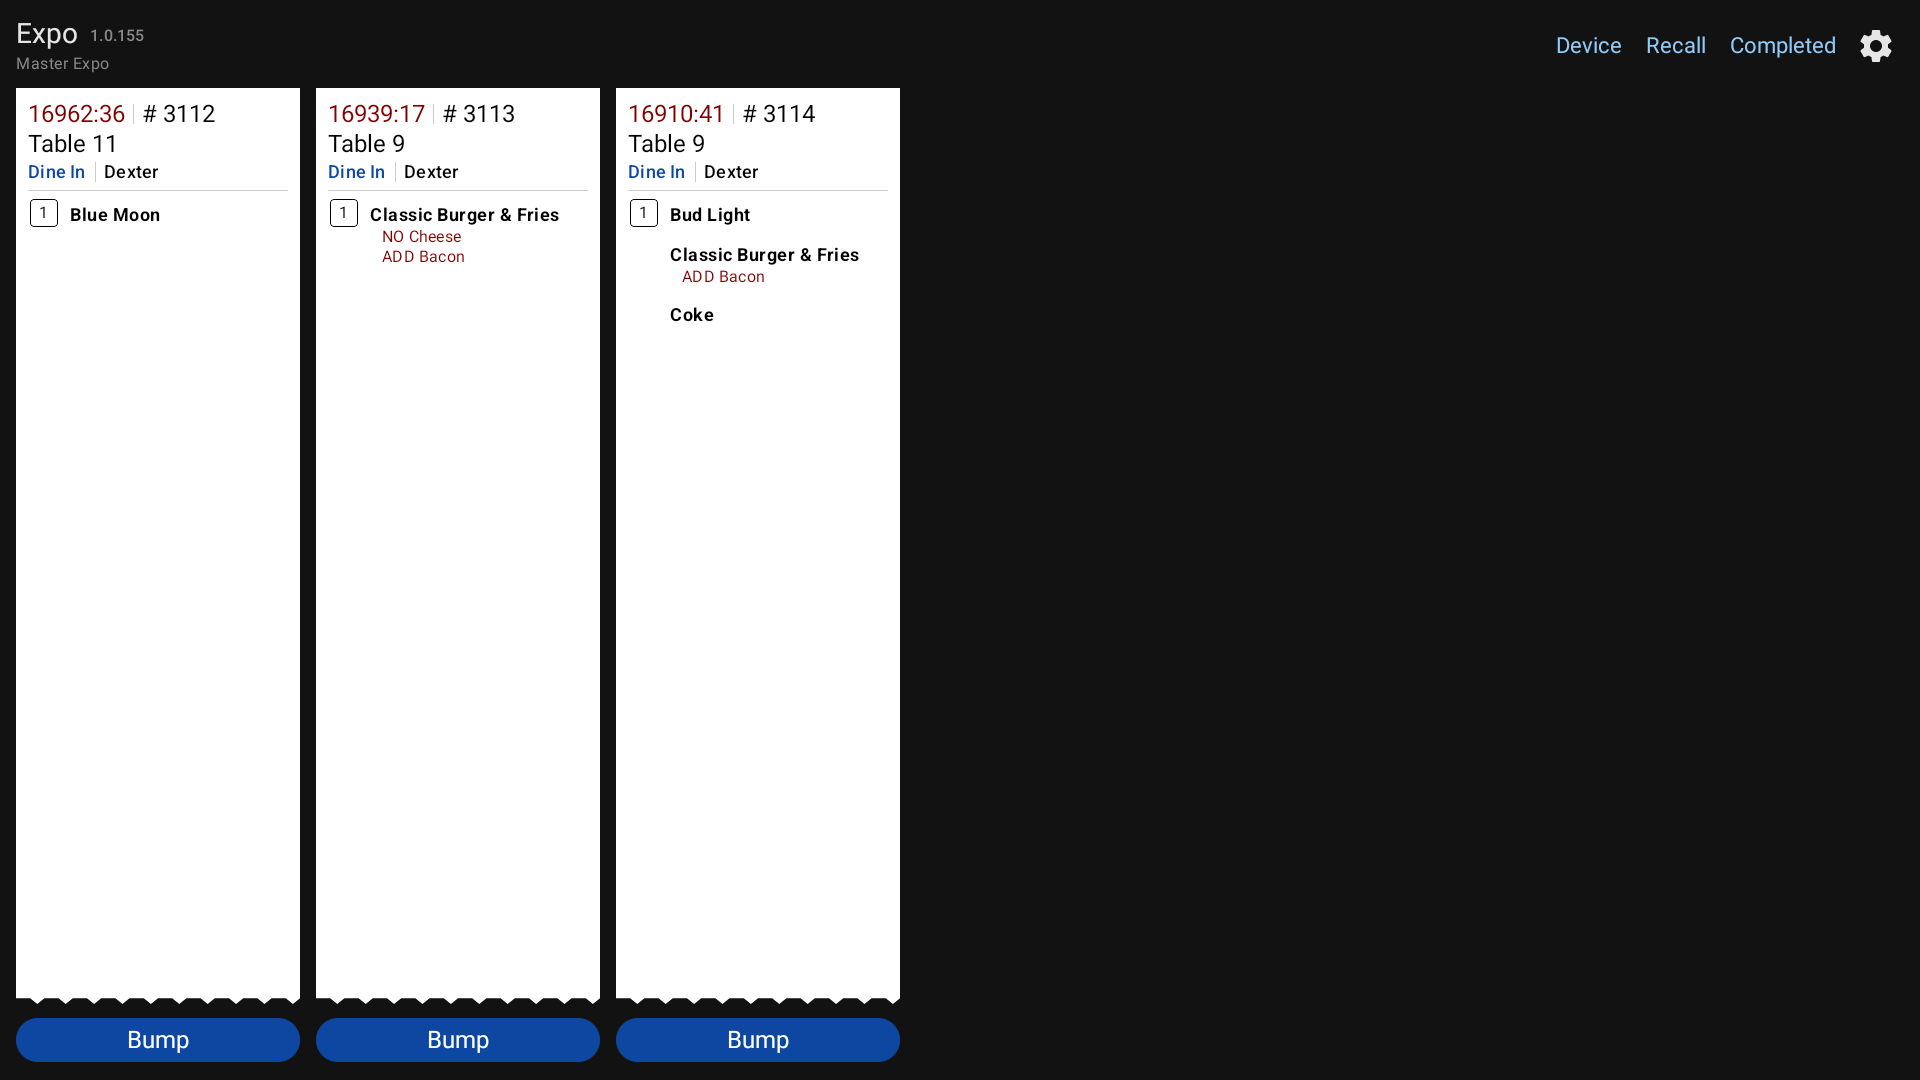 A kitchen screen showing orders
Printers. Receipt printers at the stations and kitchen printers on the line. You choose which items print (or show) where.
The back office. A website at login.realpos.net where you (and anyone else you give a login to) set up and run the restaurant: the menu, employees and their jobs, taxes, discounts, payment types, table layout, printers and kitchen screens, and all of your reports. You can use it from a computer, tablet or phone.
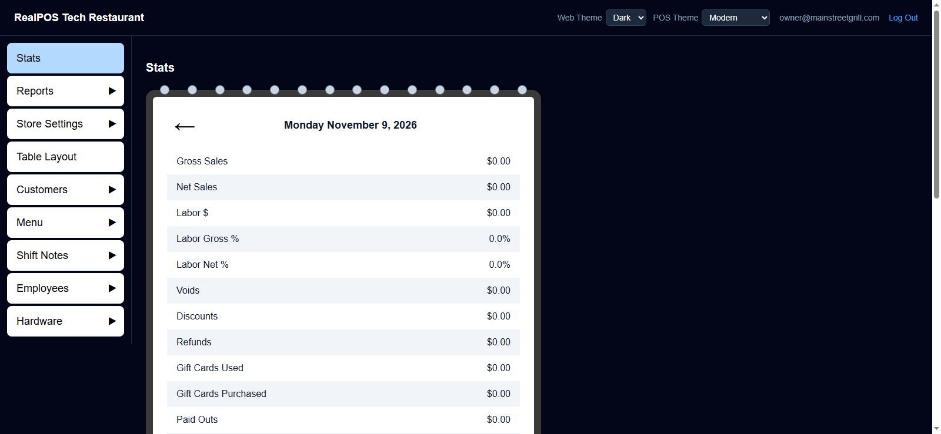 The back office
#What your dealer has already done
When your dealer created your restaurant on RealPOS, they set up:
- Your restaurant's back office login, and sent you a welcome email to create your password.
- Your first manager employee, with a POS PIN. Your dealer gives you this PIN.
- Four starter jobs: Manager, Server, Cashier and Kitchen, each with a sensible set of permissions you can change.
- The standard payment types and printer templates.
- Your store's sales tax rate.
Your menu, floor plan and hardware are built next, with you.
#The order to set things up in
- Sign in to the back office. Use the link in your welcome email to create your password. See Sign in to the back office.
- Send in your menu. Your dealer builds it for you; you check it over. See Submit your menu for programming.
- Check your taxes. Make sure every item is taxed at the right rate (or not at all). See Set your tax rate.
- Set up your jobs. Decide what each job (server, bartender, cashier, manager...) is allowed to do. See Add jobs and set their security.
- Enter your employees. Give each person a PIN, their jobs and their pay rate. See Enter your employees.
- Set up your discounts. The discount buttons your staff will use, and who can use them. See Set up discounts.
- Finish the rest and test. Payment types, table layout, printers, kitchen screens and terminals, then a test order from start to finish. See Before you open.
#Getting help
Your dealer is your first stop for anything about setup. You can also email support@bayareapointofsale.com.
Sign in to the back office
Create your password from the welcome email, sign in to login.realpos.net, and reset a forgotten password.
The back office is the website where you set up and run your restaurant. It's at login.realpos.net. You sign in with your email address and a password you choose. (This is separate from the 4-digit PIN staff use on the POS.)
#The first time: create your password
When your dealer sets up your restaurant, you get an email titled Welcome to RealPOS - create your password.
- Open the email and click Create your password.
- The page says Welcome - create your password and shows the email address the login is for.
- Type a password in Password, and the same password again in Type it again. It needs at least 8 characters, with a letter, a number and a special character (like ! or #).
- Click Save password.
- When you see Password saved, click Go to sign in.
#Sign in
- Go to login.realpos.net.
- Type your Email address and Password.
- Click Sign In.
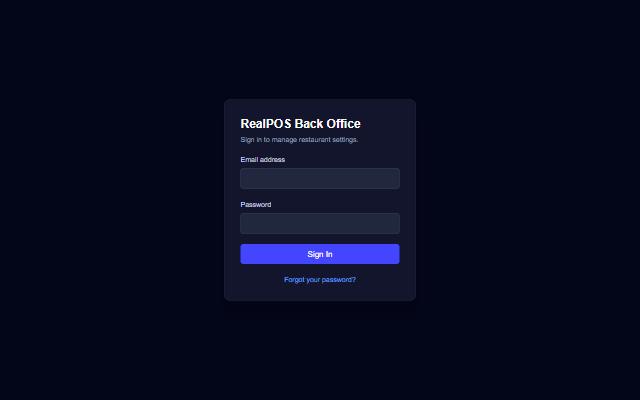 The back office sign-in page
You land on the Stats page. The menu down the left side (on a phone, tap the menu button at the top left) takes you to everything else: Reports, Store Settings, Table Layout, Customers, Menu, Shift Notes, Employees and Hardware.
To sign out, click Log Out at the top right.
If you see Invalid email or password., check the email address for typos and try the password again, or reset it (below).
#Forgot your password?
- On the sign-in page, click Forgot your password?
- Type your Email address and click Send reset link.
- Check your email for Reset your RealPOS password and click Choose a new password.
- Type the new password twice and click Save password, then sign in with it.
#Good to know
- More logins. Each person who needs the back office should have their own login. Ask your dealer to add one; the new person gets their own welcome email to create their password.
- Your POS PIN is different. The back office uses your email and password. The POS terminals, handhelds and the POS Manager screens use your 4-digit employee PIN. See Enter your employees.
- Changes reach the terminals by themselves. What you save in the back office is sent to your POS terminals the next time they sync. There is nothing to "publish".
Submit your menu for programming
What to send your dealer so your menu is built right the first time, and how to check it once it's in.
You don't have to build your menu yourself. Send it to your dealer (or to support@bayareapointofsale.com) and they program it into RealPOS for you. The more complete the information you send, the fewer questions and corrections there are later.
#What to send
Start with your menu itself: a PDF, or clear photos of every page, including the drink list, specials board, kids menu and anything else you sell. Then add the details below. A marked-up copy of the menu or a simple spreadsheet is fine.
#Prices and sizes
- The price of every item, as you will charge it on opening day.
- Items that come in sizes (small/large, glass/bottle, 6 oz/10 oz) and the price of each size.
- Items whose price is typed in at the register each time, like market-price fish or a custom cake. These are set up as Open Price items.
- Items sold by weight, and whether they're priced by the pound (Lb.) or the ounce (Oz.).
#Choices (modifiers)
For each item that comes with choices, list the choices and what they cost. Choices are grouped into sets, like "Temperature", "Sides", "Dressing" or "Add-ons". For each group, say:
- Which are required. For example, a steak must have a temperature. The POS won't let the server finish the item until the required number of choices is picked.
- How many can be picked. For example, "pick up to 2 sides".
- Whether the same choice can be picked more than once. For example, extra shots.
- Whether any are free. For example, "first 2 sides free, then $1.50 each".
- The price of each choice, including choices that cost more on some items than others.
Also list the short notes your staff send to the kitchen all the time, like "No Salt", "Allergy" or "On the Side". These are set up as Instructions.
#Pizzas
If you sell pizza, send:
- Each size and its base price (for example 12" and 16").
- Whether toppings can go on the whole pizza, on half (left or right), or on quarters, for each size.
- The topping price for each size and for whole, half and quarter.
- Premium toppings that cost more than the others, and their prices.
- How many toppings (if any) are included free.
#Kitchen printers and screens
Say where each item should print or show up: the kitchen printer, the bar printer, the grill screen, the Expo screen, and so on. An item can go to more than one place. If a whole section of the menu goes to the same place ("all drinks go to the bar"), just say so.
If you have a shorter name the kitchen uses for an item, include it. Items can have a separate Kitchen Name that prints on kitchen tickets and screens.
#Time-of-day pricing and menus
- Special prices by time of day, like happy hour: the days, the start and end times, and the special price of each item.
- Menus that only show at certain times, like breakfast or late night: the days and times each one should appear on the POS.
#Tax
- Your sales tax rate, and any items taxed at a different rate (for example, liquor).
- Anything that isn't taxed at all.
See Set your tax rate for how tax works in RealPOS.
#Discounts
- Items that should never be discounted (for example, gift cards or alcohol where the law requires it).
Your discount buttons themselves are covered in Set up discounts.
#How you want the POS laid out
- The screens (departments) you want down the left side of the POS order screen, in the order you want them. For example: Appetizers, Salads, Entrees, Sides, Desserts, Kids, Beer, Wine, Liquor, NA Drinks.
- Which items go on which screen, and any item that should appear on more than one screen.
- How you want sales grouped on your reports (for example Food, Beer, Wine, Liquor). These groups are called categories.
- Your order types, like Dine In, To Go, Delivery or Bar Tab.
#Barcodes (optional)
If you scan items with a barcode scanner, send the barcode for each item.
#What happens next
Your dealer builds the menu in your back office. When they tell you it's ready, check it over:
- Sign in to the back office and open Menu.
- Look through Items: names, prices, and the department each item is in.
- Click an item to see everything about it: its Price, Open Price and Sold by Weight settings, Department, Printer / KDS, Tax, Modifier Sets and Price Schedules.
- Check Departments (the order they appear on the POS), Modifier Sets (the choices and which are required) and Order Types.
- Send your dealer a list of anything that needs to change, or make small fixes yourself.
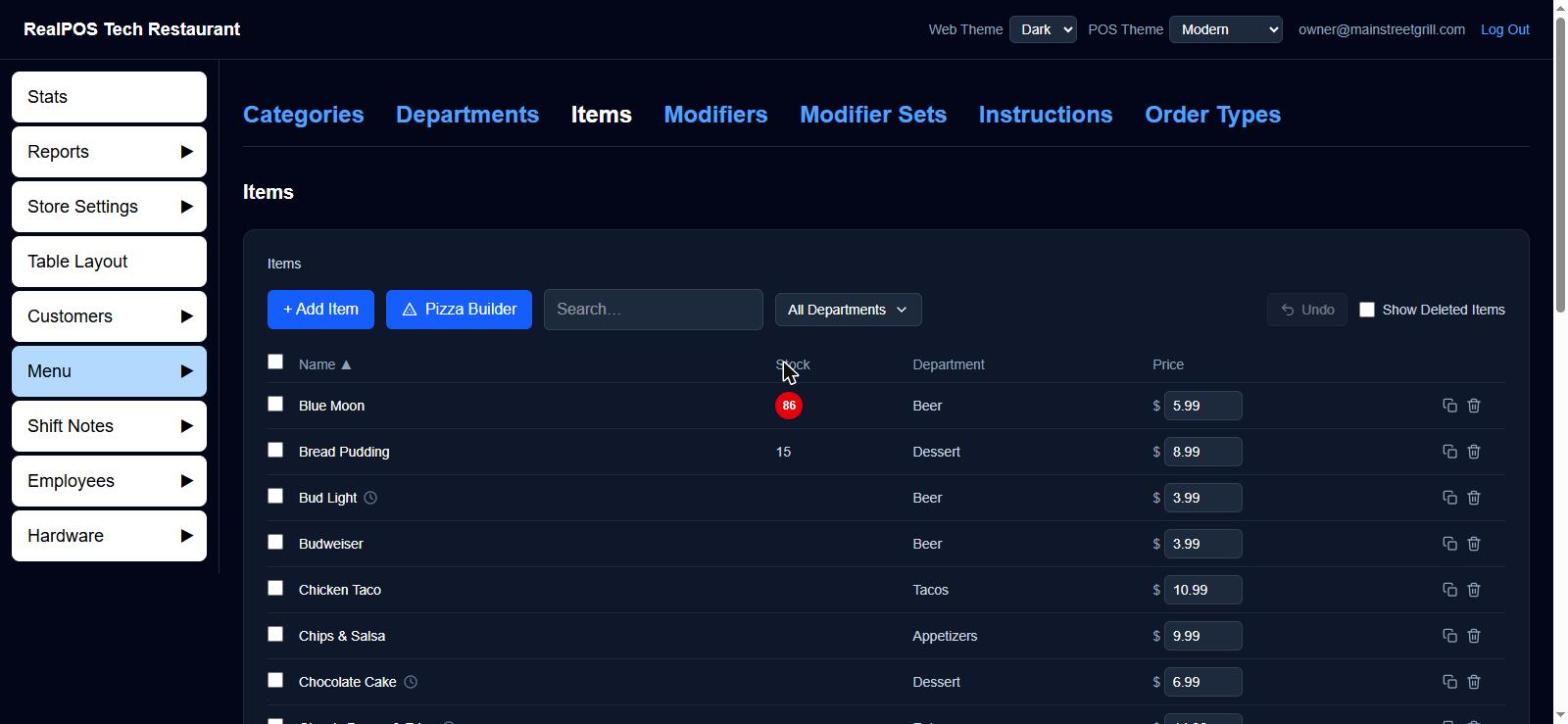 The Items list in the back office
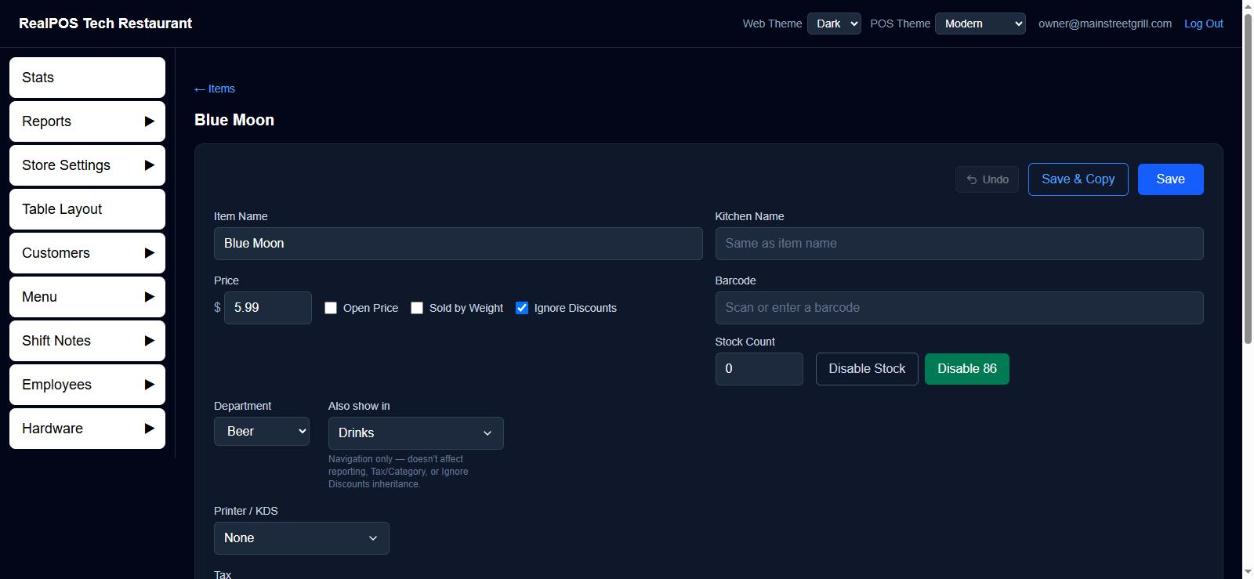 An item's settings
#Changing your menu later
Your menu is yours to change any time in the back office (or on the POS, in the Manager screens). Changes reach your terminals on their own. The manager manual covers each part of the menu:
Add jobs and set their security
Create the jobs your staff work (server, bartender, cashier, manager...) and choose what each job is allowed to do on the POS.
Every employee has one or more jobs. A job decides two things: the default pay rate, and what that person is allowed to do on the POS (their permissions). You set security once on the job, not on each person, so everyone who works as a Server has the same rights.
A new restaurant starts with four jobs:
| Job | What it starts with |
|---|---|
| Manager | Every permission. |
| Server | Taking orders, moving tables, splitting and combining checks, voiding items, transfers, gratuity, holds, taking payment, loyalty, and clocking in and out. |
| Cashier | Much the same as Server, plus gift cards and discounts (including open discounts). It does not have Clear Order, Cancel Order or Hold. |
| Kitchen | Clocking in and out only. Kitchen staff go to their own employee menu and can't take orders. |
You can change these, copy them, or add your own (Bartender, Host, Shift Lead...).
#Add a job
- In the back office, go to Employees > Jobs.
- Click + Add Job.
- Type the Job Name, for example "Bartender".
- Optional: type a Default Pay Rate. It fills in automatically as the wage when you give this job to an employee, and you can change it for each person.
- Under Permissions, check each thing this job is allowed to do. Each permission shows a short explanation under its name. Type in Search permissions… to find one quickly.
- Click Save.
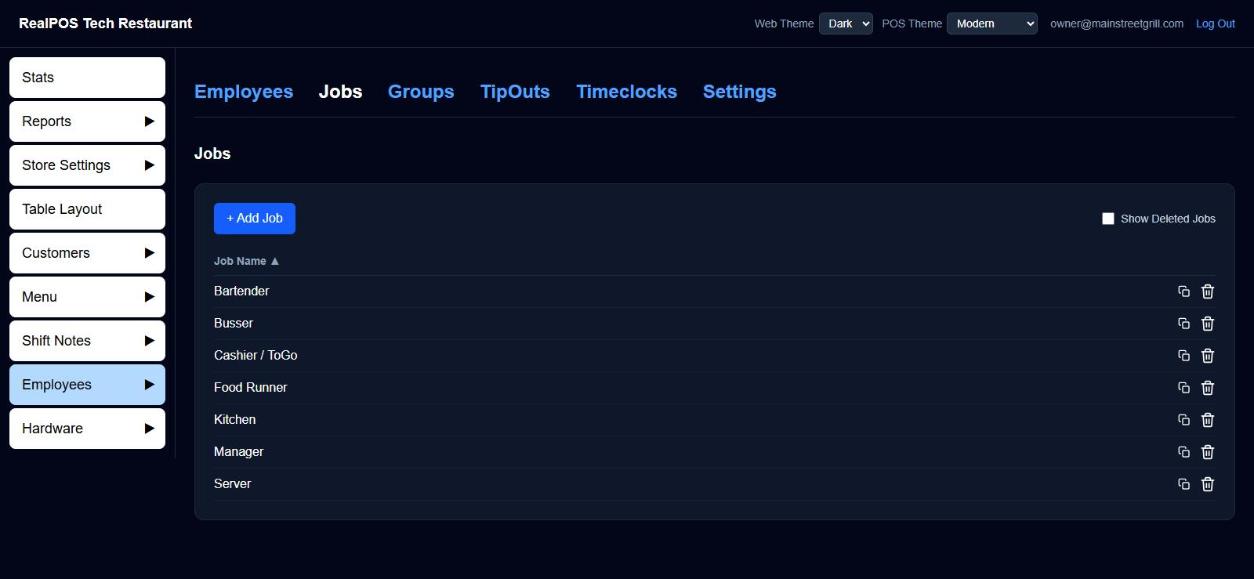 The Jobs list
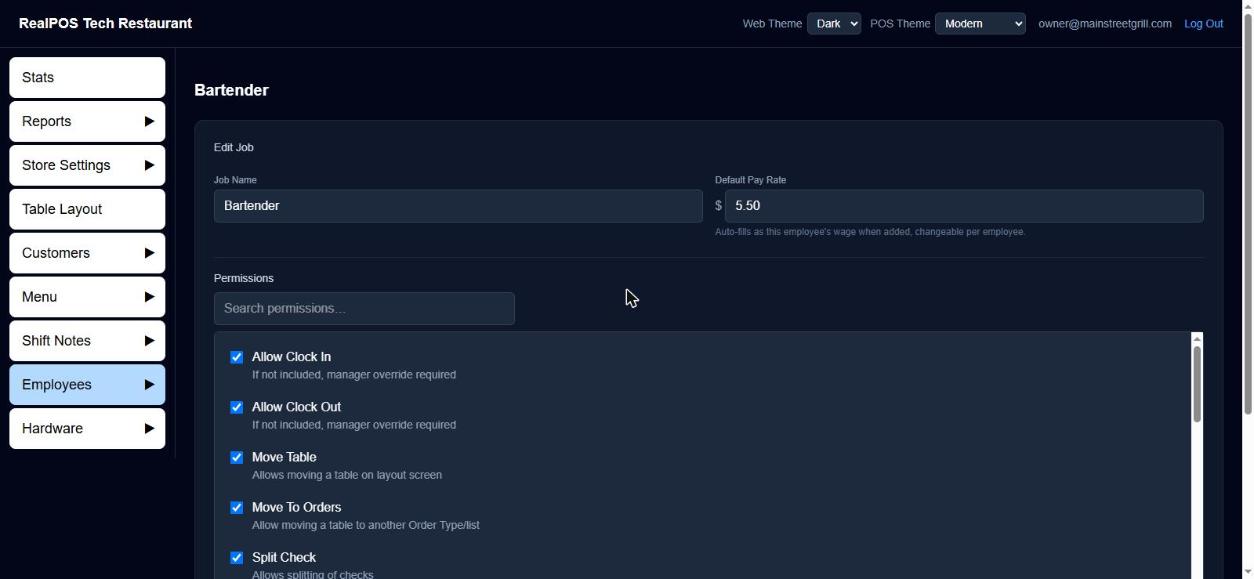 A job's name, default pay rate and permissions
#Change or remove a job
- Change a job: click its name on the Jobs list, make your changes and click Save.
- Remove a job: click the trash icon beside it. The job is hidden, not erased, so past timeclock and payroll records keep their job. To bring it back, check Show Deleted Jobs and click the green + beside it.
#What each permission allows
When a job doesn't have a permission, using that feature usually asks for a manager override: a manager enters their override code to allow it that one time. Anything on the POS that isn't on this list, anyone can use.
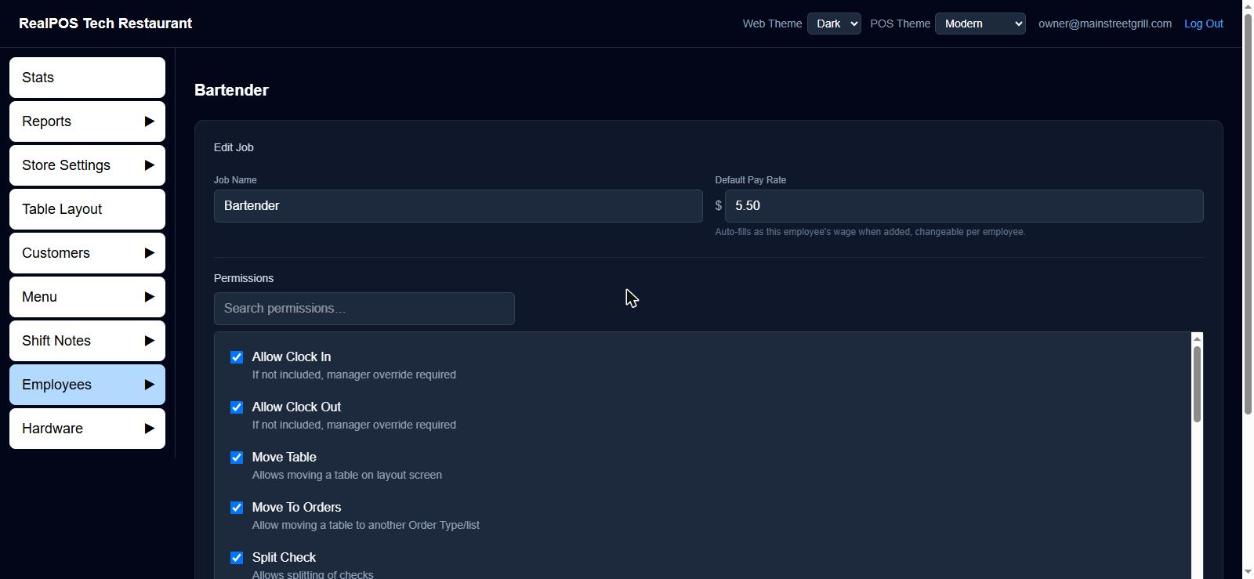 The permissions on a job
#Time clock
| Permission | What it allows |
|---|---|
| Allow Clock In | Clocking in without a manager. Without it, a manager must enter their override code for this person to clock in. |
| Allow Clock Out | Clocking out without a manager. Without it, a manager must enter their override code to clock them out. |
#Taking orders
| Permission | What it allows |
|---|---|
| Order Taker | Taking orders, and getting into the table layout and the orders lists. Without it, the person is treated as kitchen or back-of-house staff: after clocking in they only see their own employee menu. |
| Clear Order | The Clear Order button while in an order. |
| Cancel Order | Using the back button to leave an order after items have been rung in. (Anyone can go back from an order with nothing rung in yet.) |
| Hold | Holding items on an order. |
| Transfer | Transferring an order to another employee. |
| Move Table | The Move Table button on the table layout. |
| Move To Orders | Moving a table to another order type or orders list (Move to Orders on the table layout, or Move on the orders screens). |
| See All Staff Orders | Seeing every employee's orders on the Orders screens, not just their own, and adding or correcting the tip on any of them. Cashing out someone else's order leaves its sales and tips on the original server's report. |
#Checks and payment
| Permission | What it allows |
|---|---|
| Cash Out Order | Taking payment for orders. Without it, the pay buttons need an override. |
| Split Check | Splitting checks, anywhere it appears. |
| Combine Checks | Combining checks, anywhere it appears. |
| Gratuity | Adding a gratuity to an order. |
| Refunds | General refunds and refunding an order back to the original card, cash or gift card. |
#Discounts, prices and voids
| Permission | What it allows |
|---|---|
| Discounts | Using discounts marked Secure. Discounts that aren't marked Secure can be used by anyone. |
| Open Discounts | Typing in their own discount amount or percent on the discount keypad. Without it, they can type one, but pressing OK asks for a manager override. |
| Change Price | Changing an item's price for that order only (the Change Price button). |
| Void Item | Voiding an item. |
| Void Order | Voiding an entire order. |
#Gift cards and loyalty
| Permission | What it allows |
|---|---|
| Gift Card | Loading gift cards. Anyone with Order Taker can look up a gift card balance. |
| Loyalty | Adding a loyalty customer to an order, or using the loyalty button in an order. Anyone with Order Taker can look up a loyalty customer. |
#Manager screens on the POS
| Permission | What it allows |
|---|---|
| Manager | Getting into the Manager menu on the POS. Give it together with at least one of the permissions below, or the person is told to add a sub menu permission to their job. |
| Reports | The Reports section of the Manager menu. |
| Shift Notes | The Shift Notes section of the Manager menu. |
| Menu Builder | The Menu section of the Manager menu. |
| Employees | The Employees section of the Manager menu. |
| See Wages | Seeing employees' wages in the Manager menu. Without it, the wage on an existing employee shows as ****. A wage can still be typed once when adding a new employee. |
| Terminal Settings | Opening a terminal's own Settings screen (long-press the terminal name at the top of the POS). Without it, a manager override is needed. |
#Good to know
- Permissions are for the POS. They control the POS terminals and handhelds. The back office uses its own email logins; see Sign in to the back office.
- Changes take effect on their own. What you save here reaches the terminals on their next sync.
- Start strict. It's easier to add a permission when someone needs it than to find out a new hire could void orders. Give voids, refunds, open discounts and the Manager menu only to the jobs that need them.
- Next step: Enter your employees and give each one their jobs.
Enter your employees
Add each employee in the back office with their name, 4-digit POS PIN, jobs and pay rate.
Each person who uses the POS needs an employee record. It holds their name, the 4-digit PIN they sign in with, and the jobs they work with the pay rate for each.
#Add an employee
- In the back office, go to Employees > Employees.
- Click + Add Employee.
- Fill in the form:
| Field | What to enter |
|---|---|
| First Name * | Required. |
| Last Name | Optional. |
| Nickname | Optional. When set, it shows on receipts and kitchen screens instead of the first name. |
| Payroll ID | Optional. The ID your payroll company uses for this person. |
| Email Address | Optional. |
| Phone Number | Optional. |
| Login Pin * (4 digits) | Required. The PIN they type to sign in on the POS. Exactly 4 digits, and different from every other employee's PIN. |
| Hired Date | Starts as today. Change it if they started earlier. |
| Group | Optional. Put them in one or more employee groups, if you use them. |
- Under Jobs, click + Add Job and pick a job from the list. The wage beside it fills in from the job's Default Pay Rate. Change it if this person is paid differently.
- If they work more than one job (say, Server and Bartender), click + Add Job again for each one, each with its own wage. To take a job off, click the ✕ beside it.
- Click Save.
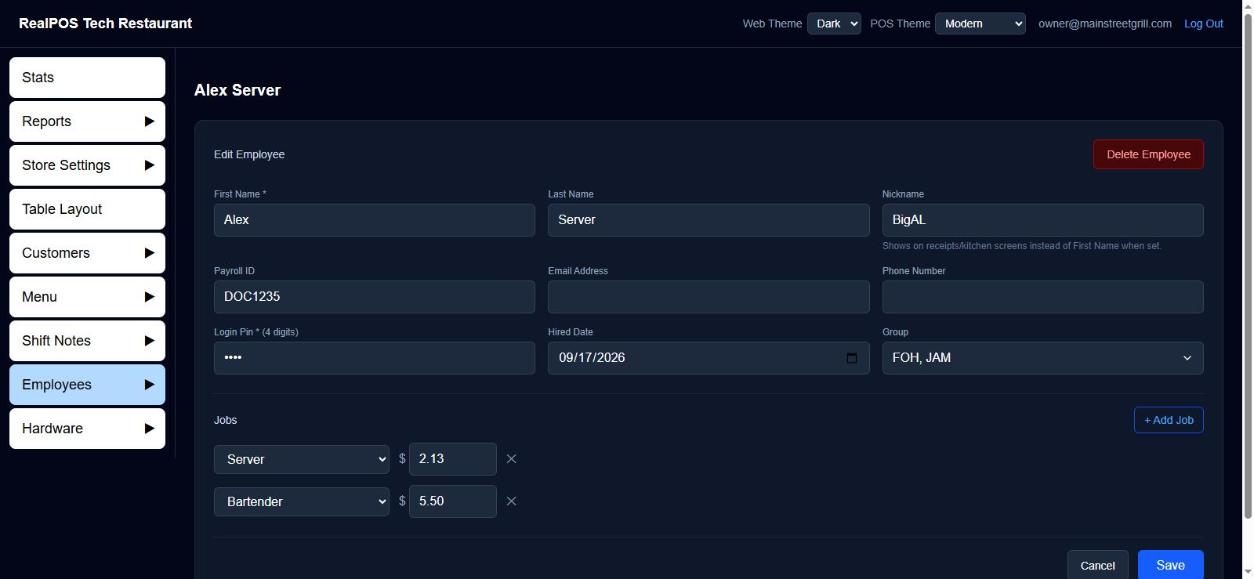 Adding an employee: name, PIN and jobs
Give the new employee their PIN. They can sign in on the POS right after the terminal next syncs.
#Find, change or remove an employee
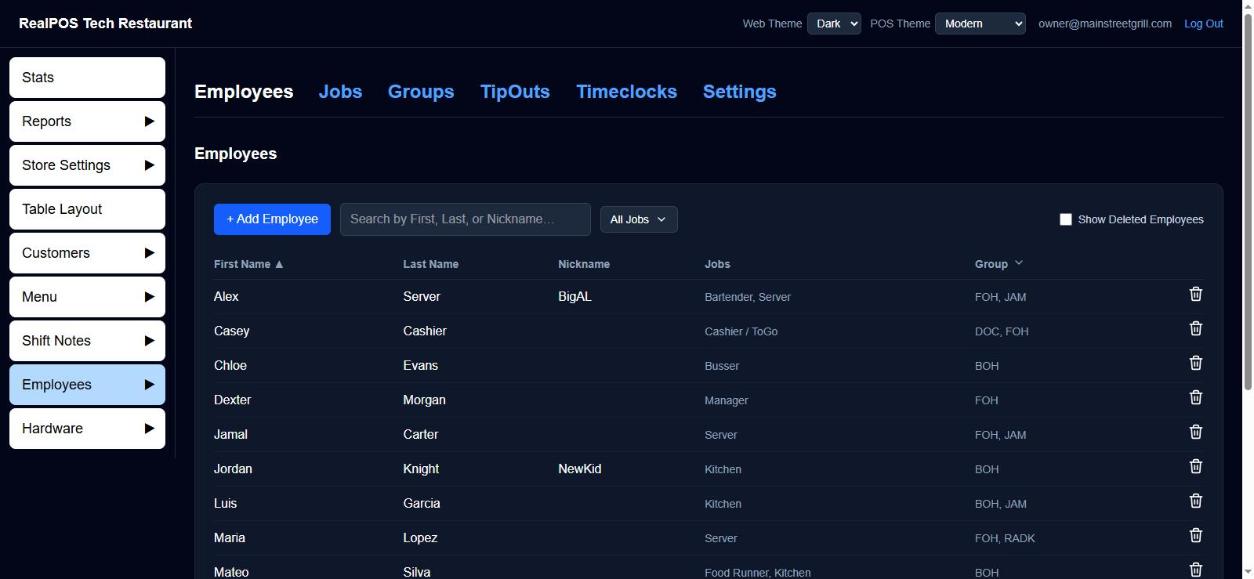 The Employees list
- Find someone: type in Search by First, Last, or Nickname…, or narrow the list by job or group. Click a column heading to sort by it.
- Change someone: click their name, make your changes and click Save.
- Remove someone who has left: click the trash icon beside them on the list, or open them and click Delete Employee, then Delete. They are hidden, not erased: their past orders, timeclock entries and reports stay as they were.
- Bring someone back: check Show Deleted Employees and click the green + beside them.
#Good to know
- If you see "That PIN is already in use by another employee.", someone (possibly a removed employee) already has that PIN. Choose another.
- Pay rates and payroll. The wage on each job is that person's hourly wage when they work that job. Set your pay period, overtime rules and tip settings under Employees > Settings (the Payroll Settings page). See Payroll.
- On the POS too. Managers can also add and edit employees on a POS terminal, in the Manager menu, if their job has the Employees permission. Wages there are hidden unless the job also has See Wages.
- Your first manager is already there. Your dealer created your first manager employee when your restaurant was set up. Check their details and change the PIN if you like.
Set your tax rate
How RealPOS decides the sales tax on each item, how to add a tax rate, and how to make items non-taxable or an order tax exempt.
Sales tax in RealPOS is set up in three places that work together:
- Taxes (in Store Settings): the tax rates themselves, like "Sales Tax 8%" or "Liquor Tax 10%".
- Categories (in Menu): reporting groups like Food, Beer, Wine and Liquor. Each category gets one of your taxes.
- Departments and Items (in Menu): each department belongs to a category, and an item can have its own tax or be marked Non Taxable.
Your restaurant also has a store sales tax rate, set by your dealer when your restaurant was created.
#How the tax on an item is decided
When an item is rung in on the POS, RealPOS works out its tax in this order:
- Non Taxable is checked on the item, or on its department: no tax.
- The item has its own Tax picked: that rate.
- Otherwise, the tax on the item's department's category. If that category is set to No tax assigned, items in it are not taxed (unless the item picks a tax of its own).
- If the department has No category assigned: the store sales tax rate.
The tax is fixed on each item when it is rung in, so changing a tax setting affects new items rung in from then on, not items already on open checks.
#Add a tax rate
- In the back office, go to Store Settings > Taxes.
- Under Named Taxes, type a name (for example "Sales Tax" or "Liquor Tax") and the rate in the % box.
- Click +.
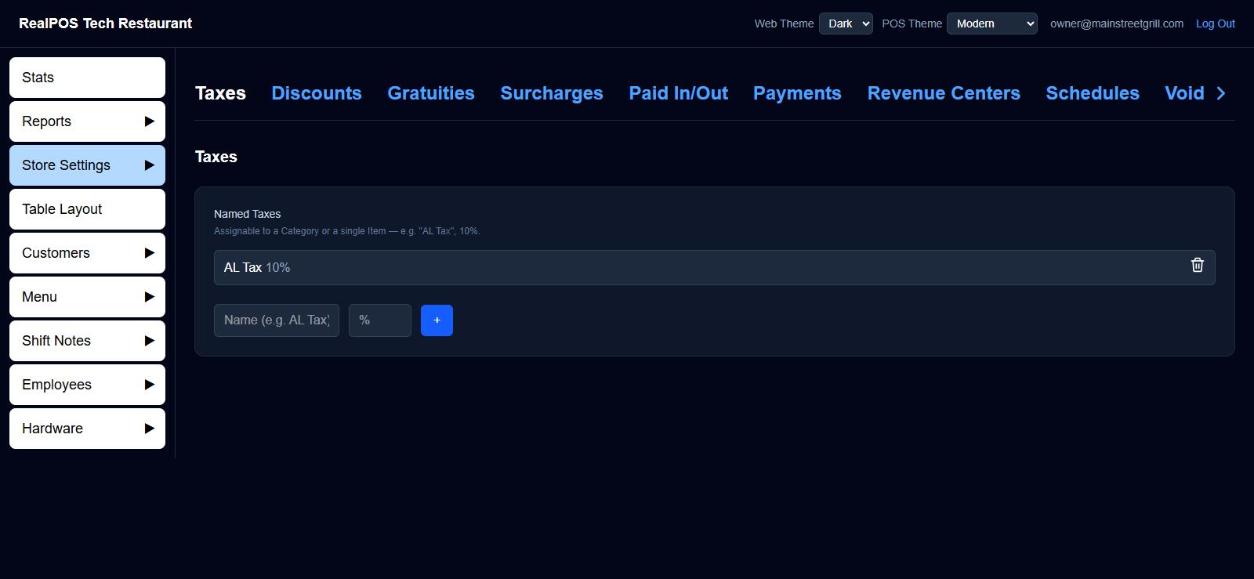 The Taxes page
To remove a tax, click the trash icon beside it.
#Give a category its tax
- Go to Menu > Categories and click the category.
- Pick the rate in Tax.
- Click Save.
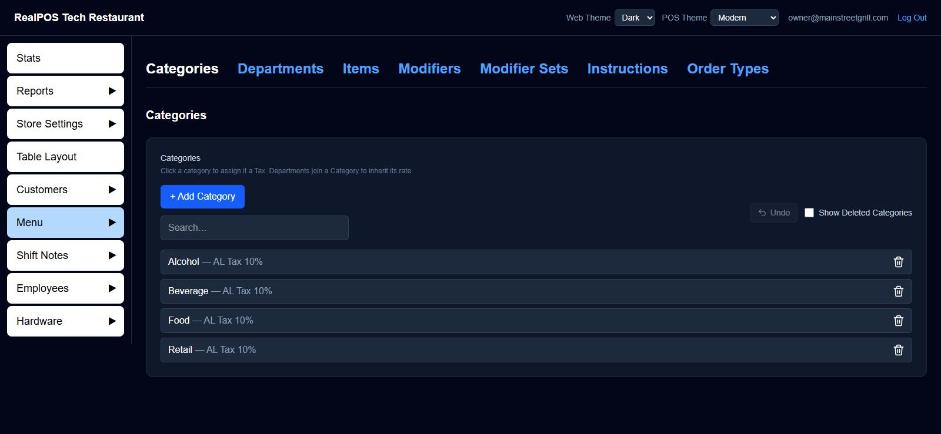 Categories, each with its tax
On the Categories list, a category with no tax shows No Tax Assigned beside its name. Check this list carefully: everything in a category with no tax is rung in with no tax.
Then make sure each department is in the right category: go to Menu > Departments, click a department, and pick its Category, then click Save.
#Give one item a different tax
- Go to Menu > Items and click the item.
- In Tax, pick the rate. Leave it on Inherit from Dept/Category to use its category's tax.
- Click Save.
#Make items non-taxable
- One item: open the item and check Non Taxable (beside Tax), then Save.
- A whole department: open the department under Menu > Departments, check Non Taxable, then Save.
Non-taxable sales are listed on the Non Taxed Items Sales Report under Reports > Sales.
#Tax exempt orders
Some guests don't pay sales tax at all, like a church group or a school with a tax-exempt certificate. That's done on the POS for the one order, not in the menu: on the Pay screen, tap Tax Exempt and type a message for the receipt, such as the group's name or their tax ID. Every tax-exempt order, with its message, is on the Tax Exempt Sales Report under Reports > Sales.
#Good to know
- Check before you open. Ring in one item from each department on a test order and look at the tax on the check. It's the quickest way to catch a department in the wrong category or a category with no tax.
- Changing the store sales tax rate. There isn't a screen for it in the back office. Ask your dealer or support@bayareapointofsale.com.
- More about categories and departments: Categories and departments.
Set up discounts
Create the discount buttons your staff use on the POS, choose percent or dollar amount, and control who can use them.
Discounts are set up in the back office and used on the POS from the Discount (whole order) and Item Discount screens. You can give staff ready-made buttons (named discounts, like "Employee Meal 50%" or "$5 Off"), let them type their own amount (open discounts), or both.
#Add a named discount
- In the back office, go to Store Settings > Discounts.
- Click + Add Discount.
- Type the Discount Name. This is what shows on the POS button.
- Set the Amount. The button beside the box switches between % (a percent off) and $ (a dollar amount off). Click it to change. Percents are whole numbers from 1 to 100; dollar amounts can have cents.
- Choose where it can be used:
- Order Discount: shows on the discount screen for the whole order.
- Item Discount: shows on the discount screen for the selected items. Check one or both.
- Check Secure if only certain jobs should be able to use it (see below).
- Click Save.
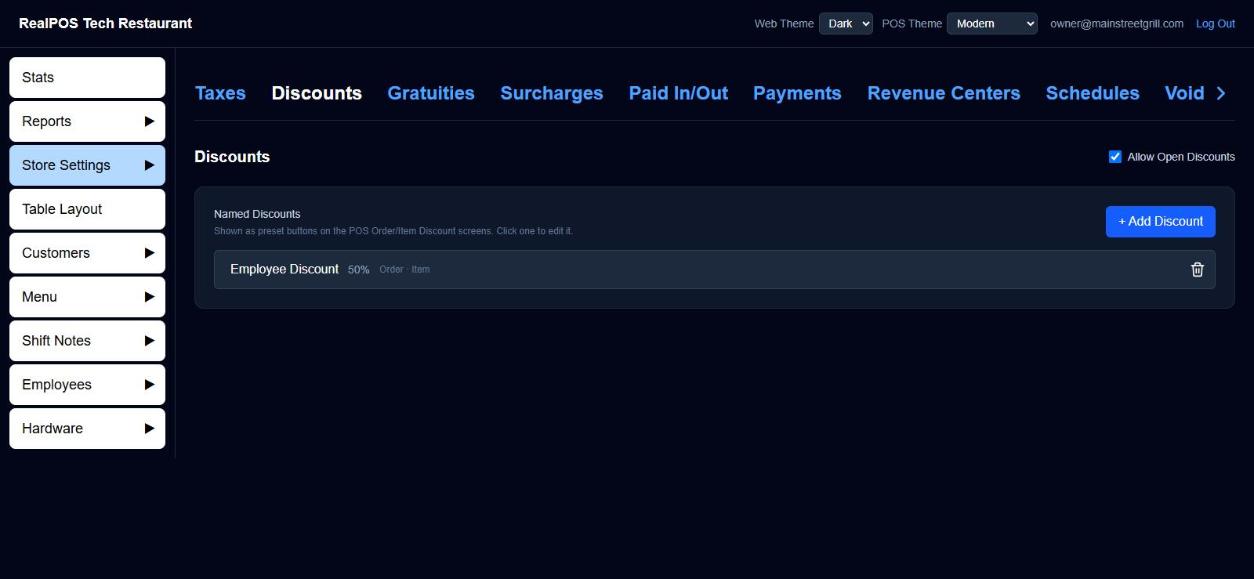 The Discounts page with named discounts
Each discount on the list shows its amount and where it's used (Order, Item, Secure). Click one to change it. Click the trash icon to delete it; it's removed straight away.
#Open discounts
Allow Open Discounts, at the top right of the Discounts page, decides whether staff can type their own percent or dollar amount on the POS discount screens.
- Checked: the discount screens show a keypad for a custom amount, as well as your named discount buttons.
- Unchecked: staff can only use your named discounts.
The setting saves as soon as you click it.
#Who can use discounts
Discounts are controlled by two permissions on each job (Employees > Jobs):
| Permission | What it controls |
|---|---|
| Discounts | Using a named discount marked Secure. Discounts not marked Secure can be used by anyone. |
| Open Discounts | Typing in a custom amount or percent. Without it, pressing OK on a typed discount asks for a manager override. |
Without the permission, a manager can still allow it with a manager override. See Add jobs and set their security.
#Items that can't be discounted
Some things should never be discounted, like gift cards. Check Ignore Discounts on the item (Menu > Items), on its department (Menu > Departments), or on its category (Menu > Categories). If any of the three is checked, discounts skip that item.
#Good to know
- Discounts are tracked. Every discount used, who applied it and on which order, is on the discounts report. See Security reports.
- Time-of-day prices aren't discounts. For happy hour, give items a special price on a schedule instead. See Schedules.
- New discounts and changes reach the terminals on their next sync.
Before you open
A checklist of everything to set up and test before your first service, with links to the pages that cover each one.
Work down this list in the week before you open. Each item links to the page that walks you through it. Everything here is in the back office at login.realpos.net unless it says POS.
#The basics
- You can sign in to the back office, and everyone else who needs it has their own login. Sign in to the back office
- Your menu is built and checked: prices, choices, required choices, pizzas, and time-of-day prices. Submit your menu for programming
- Taxes are right: every category has the right tax (or none on purpose), and non-taxable items are marked. Set your tax rate
- Jobs and their security are set. Add jobs and set their security
- Every employee is entered with their PIN, jobs and wages. Enter your employees
- Discounts are set up, and the big ones are marked Secure. Set up discounts
#Store settings
- Payment types: cash, cards, gift cards and any others you take (Store Settings > Payments). Payment types
- Gratuities and surcharges, if you add an automatic gratuity for large parties or a surcharge (Store Settings > Gratuities and Surcharges). Gratuities and surcharges
- Void reasons, so staff pick a reason when they void (Store Settings > Void Reasons). Void reasons
- Order types, like Dine In, To Go and Delivery (Menu > Order Types). Order types
- Store close: your Timezone, the End of Day Time your sales reports roll over at, and whether everyone is clocked out at close (Store Settings > Store Close). Store close
- Payroll settings: pay period, overtime rules and how tips are paid (Employees > Settings). Payroll
#Your floor and hardware
- Table layout: your dining room, bar and patio, with every table numbered the way your staff know them (Table Layout). Table layout
- Printers and kitchen screens are added, and every item goes to the right one (Hardware > Printers/KDS). Printers and kitchen screens
- Terminals are activated and set up (Hardware > Terminals), and any handhelds are activated. Terminals
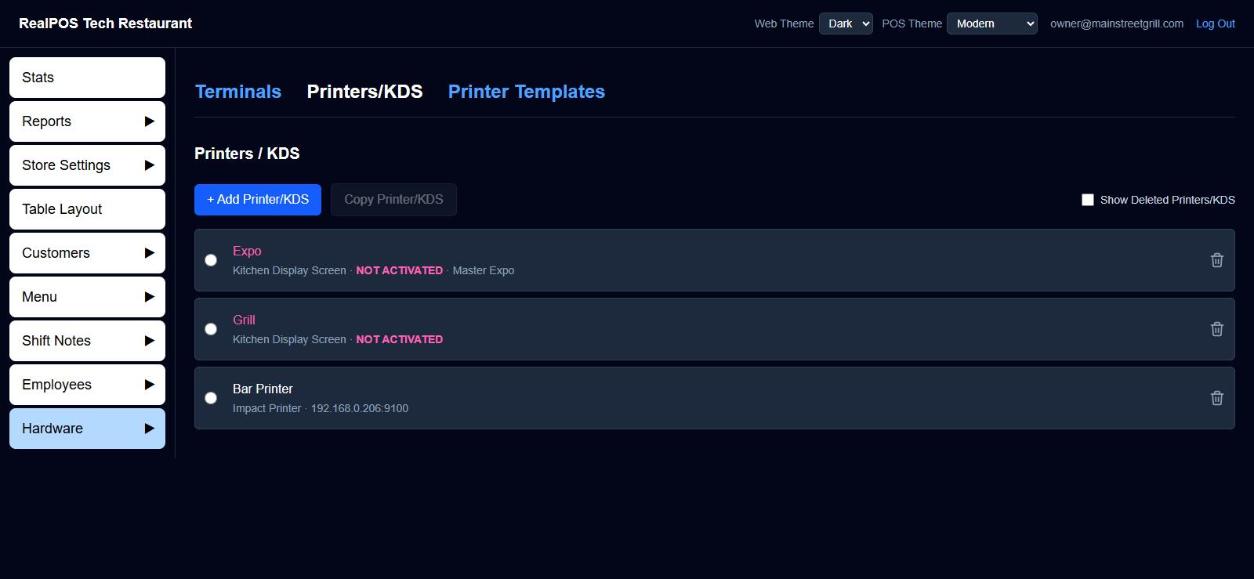 Printers and kitchen screens in the back office
#Test everything
Do a full test service a day or two before you open, on the real terminals, printers and kitchen screens:
- Every employee signs in with their own PIN and clocks in. Try something a server's job isn't allowed to do, and check a manager has to step in.
- Ring in an order with an item from every department. Check the prices and the tax on the check.
- Ring in items with required choices, a pizza, and a happy hour item (during happy hour hours, if you have them).
- Send the order and check each item prints or shows up in the right place, with the right name.
- Apply a discount, split a check, and take a cash payment and a card payment.
- Void the test orders when you're done.
- Look at the day's numbers in the back office. Reports
#Train your staff
Show each server, bartender, cashier and host how to sign in, clock in, take an order, send it and take payment. The Employee Manual covers each of those step by step, starting with Sign in and Clock in and out.
#Need a hand?
Your dealer can help with any of this, or email support@bayareapointofsale.com.